SMB - Server Message Block
This section will cover ways to enumerate Server Message Block (SMB).
Table of Contents
- Overview
- Samba
- Default Configuration
- Dangerous Settings
- SMBclient
- Mounting an SMB share
- Windows
- Linux
- Enumerating SMB
- Nmap
- rpcclient
- Impacket-smardump
- smbmap
- crackmapexec
Overview
Server Message Block (SMB) is a client-server protocol that regulates access to files and entire directories and other network resources such as printers, routers, or interfaces released for the network.
The main application area for SMB is Windows. There are some open source projects such as SAMBA which enables Unix and Linux based distributions to communicate via SMB, allowing for interoperability between Windows, Unix, and Linux.
SMB uses TCP as its protocol which can help guarantee the reliability of the file being transferred to and from the server. As an SMB server provides arbitrary parts of its file system as shares, the hierarchy visible to the client is partially independent of the structure of the server.
Access rights are defined using access control lists (ACLs). ACLs allow permissions to be controlled in a fine-grained manner based on attributes such as execute, read, and full access for individual users and/or groups.
Samba
Samba, which has been developed for Unix-based operating systems. Samba uses the Common Internet File System (CIFS) network protocol. CIFS is a "dialect" of SMB. This means that CIFS is a very specific implementation of the SMB protocol, which was created by Microsoft. CIFS is an extension of the SMB protocol.
When SMB commands are passed over Samba to an older NetBIOS service, it usually connects to the Samba server over TCP ports 137,138, and 139. However, CIFS uses port 445 only.
In SMB version 3, the Samba server gained the ability to be a full member of an Active Directory domain. With version 4, Samba can provide an AD domain controller.
The SMB daemon (smbd) belonging to Samba provides the first two functionalities while the NetBIOS message block daemon (nmbd) implements the last two functionalities respectively. The SMB service controls these two background programs.
Default Configuration
Samba offers a wide range of settings that we can configure. It can be found in the /etc/samba/smb.conf. We can use the following command to display only the settings.
cat /etc/samba/smb.conf | grep -v "#\|\;"
The below table will list some settings and their description:
| Setting | Description |
|---|---|
| [sharename] | The name of the network share. |
| workgroup = WORKGROUP/DOMAIN | Workgroup that will appear when clients query. |
| path = /path/here/ | The directory to which user is to be given access. |
| server string = STRING | The string that will show up when a connection is initiated. |
| unix password sync = yes | Synchronize the UNIX password with the SMB password? |
| usershare allow guests = yes | Allow non-authenticated users to access defined share? |
| map to guest = bad user | What to do when a user login request doesn't match a valid UNIX user? |
| browseable = yes | Should this share be shown in the list of available shares? |
| guest ok = yes | Allow connecting to the service without using a password? |
| read only = yes | Allow users to read files only? |
| create mask = 0700 | What permissions need to be set for newly created files? |
There are many more settings that are not covered in the above table.
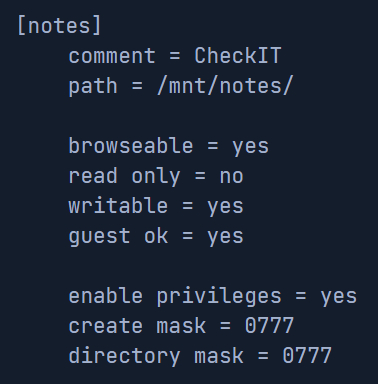
Dangerous Settings
There are many dangerous settings. An example will be browserable = yes. This setting can allow a legitimate user to have the comfort of viewing the individual directories and its contents. However, an attacker that managed to compromise the network can as well.
The below table are some dangerous settings and their description.
| Setting | Description |
|---|---|
| browseable = yes | Allow listing available shares in the current share? |
| read only = no | Forbid the creation and modification of files? |
| writable = yes | Allow users to create and modify files? |
| guest ok = yes | Allow connecting to the service without using a password? |
| enable privileges = yes | Honor privileges assigned to specific SID? |
| create mask = 0777 | What permissions must be assigned to the newly created files? |
| directory mask = 0777 | What permissions must be assigned to the newly created directories? |
| logon script = script.sh | What script needs to be executed on the user's login? |
| magic script = script.sh | Which script should be executed when the script gets closed? |
| magic output = script.out | Where the output of the magic script needs to be stored? |
An example is where we create a share called [notes] with some of the above settings. This will allow us to see how enumeration works.
It is highly recommended to read the manual for Samba to see how it can be configured. The more familiar we are with the service, the easier it will be to enumerate and navigate in our environment.
Once our settings are configured, we will need to restart the service using the command systemctl restart smbd.
SMBclient
The below table will list some common flags and commands used with SMBclient and their description:
| Flag/Commands | Description |
|---|---|
| -L | List the shares on the server. |
| -N | Null session, anonymous access. |
\\\\127.0.0.1\\myshare or //10.10.10.1//notes | Specify the target and share to connect to/specify to connect to 10.10.10.1 with the share being "notes". |
| get File_Name | Download the specified file from the server. |
!<cmd> | Allows us to execute local system commands without interrupting the connection. |
An example to list all shares is:
smbclient -N -L //10.10.10.1/
Command breakdown:
-N- Specify to login as anonymous.-L- List all shares on the server.//10.10.10.1/- Specify the server to connect to.
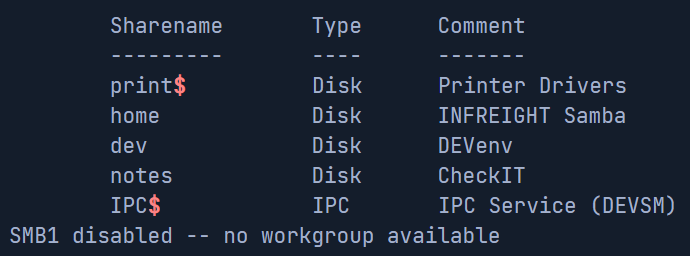
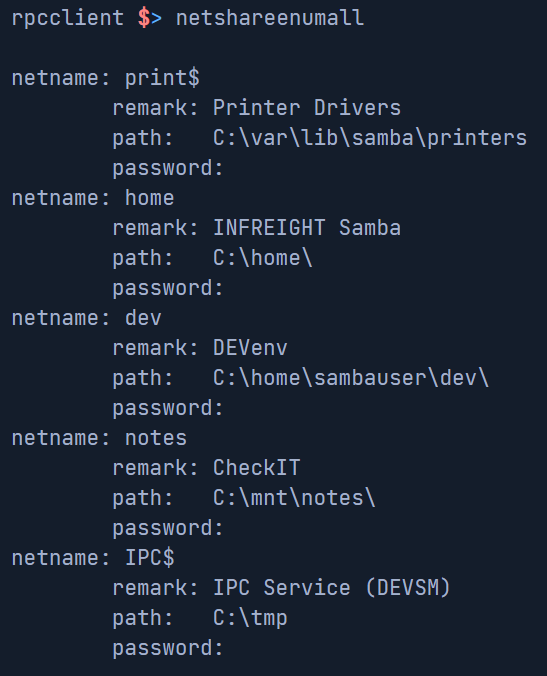
We can see that we have 5 shares on the server. The IPC$ and print$ shares are default shares while the home, dev, and notes shares were created by us.
To login using smbclient, we can use the following command:
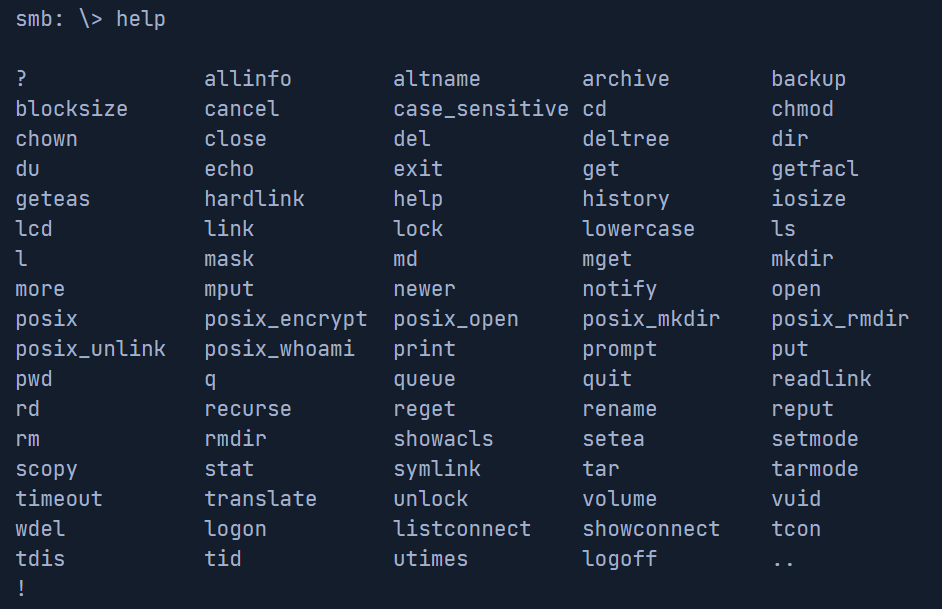
smbclient //10.10.10.1/notes
Once logged in, we can use the help command to list commands that we can use.
Mounting an SMB share
We can mount an SMB share on both Windows and Linux.
Windows
To mount the share on Windows, we can use the following command from command prompt.
net use X: \\<IP>\share /user:<username> <password>
Command breakdown:
X:- Specify the drive letter to mount the share to.\\<IP>\share- Specify the share to mount./user:<username> <password>- Specify the credentials to use for authentication.
We can also use New-PSDrive on PowerShell to do the same thing.
New-PSDrive -Name "X" -Root "\\<IP>\share" -PSProvider "FileSystem"
We can use the following to provide a username and password.
$username = '<username>'
$password = '<password>'
$secpassword = ConvertTo-SecureString $password -AsPlainTet -Force
$cred = New-Object System.Management.Automation.PSCredential $username, $secpassword
New-PSDrive -Name "X" -Root "\\<IP>\share" -PSProvider "FileSystem" -Credential $cred
Linux
On Linux, we can use the mount command.
sudo mkdir /mnt/<name>
sudo mount -t cifs -o username=<username>,password=<password>,domain=. //<IP>/share /mnt/<name>
Alternatively, we can use a credential file with the following format.
username=<username>
password=<password>
domain=.
We can use the following command to mount it.
mount -t cifs //<IP>/<share> /mnt/<name> -o credentials=/path/to/credsfile
Note that the cifs-utils package is required to connect it.
Enumerating SMB
There are many tools that we can use to enumerate SMB. One of them will be nmap. The downside with nmap is that it can sometimes take a while for the scan to complete.
Using Nmap
The following command will be an example of a scan.
nmap -sV -sC -p 139,445 10.10.10.1
Command breakdown:
-sV- Scan the version.-sC- Use default scripts.-p 139,445- Specify the ports to scan.10.10.10.1- Specify the target to scan.
Sometimes, nmap does not provide us with a lot of information. Therefore, we will need tools that can interact with SMB and send specific requests for the information.
Using rpcclient
Another tool that we called rpcclient. This tool is used to perform MS-RPC functions.
To use rpcclient, we can use the following command:
rpcclient -U "" 10.10.10.1
Command breakdown:
-U ""- Specify the username. In this case, no username.10.10.10.1- Specify the target to connect to.
rpcclient allows us to perform different queries to the server. The below table will list some common queries and their description.
| Query | Description |
|---|---|
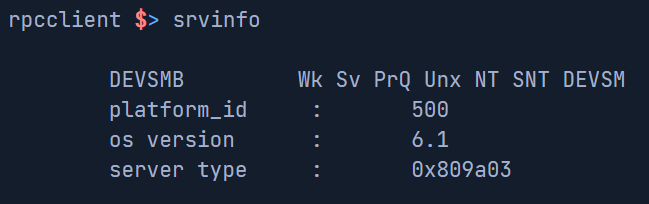
| srvinfo | Displays server information. |
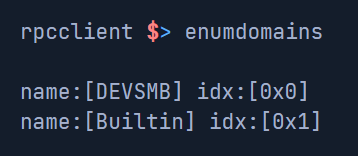
| enumdomains | Enumerate all domains in the network. |
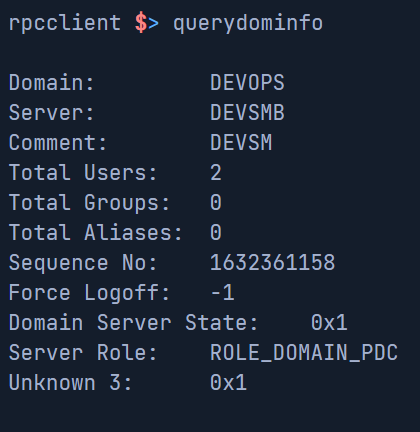
| querydominfo | Provide domain, server, and user information of deployed domains. |
| netshareenumall | Enumerate all available shares. |
netsharegetinfo <share> /netsharegetinfo notes | Provide information on the specific share/Provide information on the "notes" share. |
| enumdomusers | Enumerate all domain users. |
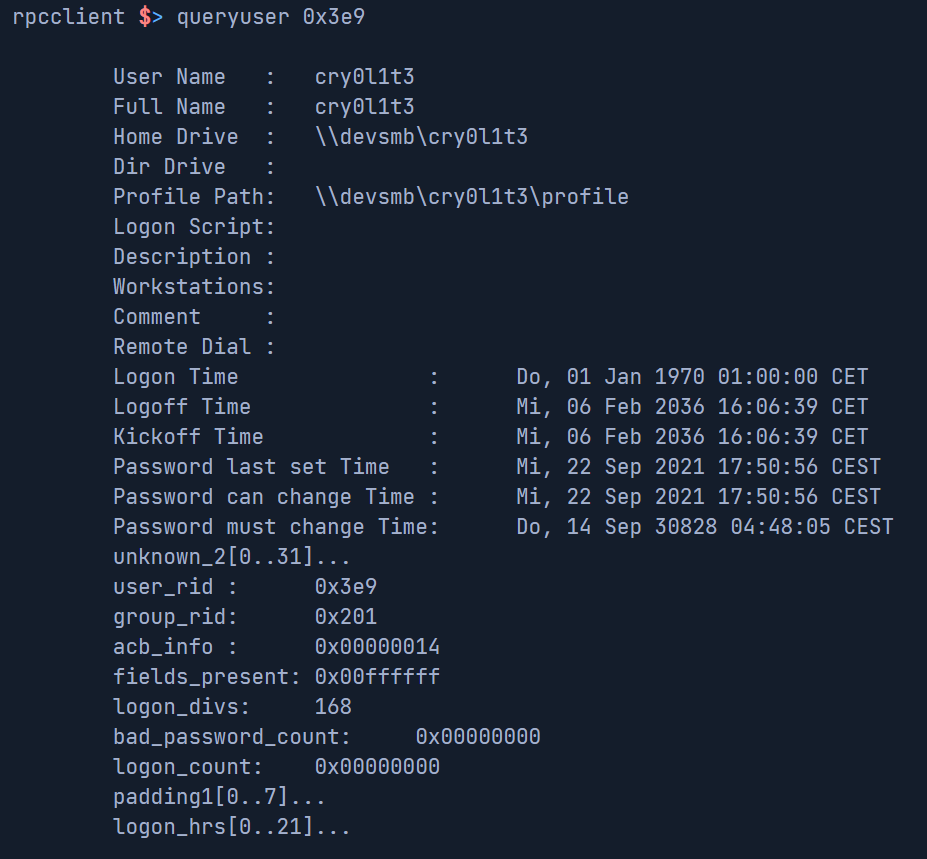
queryuser <RID> | Provides information about a specific user. |
Below are some examples of the above commands.
srvinfo:
enumdomains:
querydominfo:
netshareenumall:
enumdomusers:

queryuser <rid>:
The above examples show what information can be leaked by an anonymous user. Once an anonymous user has access to the network service, it just takes one misconfiguration to put the entire network at risk.
Impacket-samrdump
We can use tools such as Impacket-samrdump to gather the information of the users if we can query the users.
An example will be:
impacket-samrdump 10.10.10.1
Command breakdown:
10.10.10.1- IP address of target.
Alternatively, we can use tools such as smbmap and impacket-crackmapexec.
smbmap
To use smbmap, we can use the following:
smbmap -H 10.10.10.1
Command breakdown:
-H 10.10.10.1- Specify the target IP address.
crackmapexec
To use crackmapexec, we can use the following:
crackmapexec smb 10.10.10.5 --shares -u '' -p ''
Command breakdown:
smb- Specify the protocol.10.10.10.5- Specify the target IP address.--shares- Specify to list SMB shares on the target.-u ''- Specify the username. In this case, no username.-p ''- Specify the password. In this case, no password.
There are many more ways to test and enumerate SMB alongside the tools for it.